 |
| Goal Zero Nomad 7 solar panel |
In this post, we explain step-by-step how we modified the Nomad 7 solar panel to make it more convenient to use in amateur radio applications.
Goal Zero has made a very handy little solar panel in the Nomad 7. It provides power via a USB port and a 12Vdc port. This makes it possible for us to recharge our iPhone (5V USB) and Kenwood TH-F6A (12Vdc) from the Nomad 7. One of the great things about standards is how many of them there are. There are innumerable standards for 12v power connectors. We prefer the Anderson Powerpole connector for our 12Vdc applications. Unfortunately, the Nomad 7 provides 12Vdc via an 8mm connector.
 |
| Nomad 7 12Vdc via an 8mm connector |
 |
| Nomad 7 5Vdc via a USB connector |
 |
| Goal Zero's 8mm female to 4.7mm male pigtail assembly |
Replacing the 8mm male connector with an Anderson Powerpole
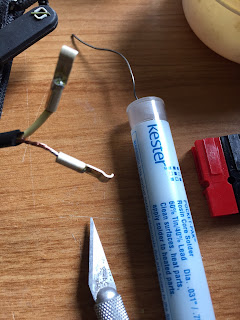
Step 1: Cut off the 8mm male connector- Leave enough wire on the Nomad 7 to comfortably solder on an Anderson Powerpole connector.
- Leave enough wire on the 8mm connector to solder on an Anderson Powerpole later if needed.
- Carefully strip the black plastic sheath about 1 inch. Take care not to cut any of the copper wire.
- Twist the copper braid into a single wire for soldering.
- Strip the white wire to the same length as the Powerpole connector.
- Slide on a short length of heat shrink tubing over the coaxial cable.
- Place the Nomad 7 in full sun and verify the positive and negative contacts using your volt meter.
- Our Nomad 7 produced 15.15 Vdc in full sun (open voltage). The Kenwood TH-F6A has a specification limit of 16V.
 |
| Nomad 7 open voltage (15.15Vdc) |
Step 4: Solder (or crimp) on the Anderson Powerpole contacts
- We prefer soldering the contacts to minimize resistance and assure good contact.
Step 5: Insert the contacts into the red/black Anderson Powerpole housing
- Be sure to install the red side on the positive connector.
- Use your volt meter or your Anderson Powerpole Polarity Checker to confirm that the red connector has been installed on the positive contact.
- Slide the heat shrink tubing up so it is snug with the Anderson Powerpole.
- Using a heat source, carefully shrink the tubing so it tight around the wires.
- This dresses the construction and provides some strain relief for the connector.
Voila! The 8mm male connector has been replaced with a much more useful Anderson Powerpole connector on the Goal Zero Nomad 7 solar panel. We can now connect our Nomad 7 to a wide variety of devices and cables that we have fabricated using Anderson Powerpole connectors. This seems like such an obvious design choice it makes us wonder why Goal Zero didn't choose the Anderson Powerpole instead of the 8mm connector to begin with? Come on world, it is time to rally around the Anderson Powerpole for 12Vdc applications.
 |
| Nomad 7 with Anderson Powerpole installed |
In our next post (Project: Fabricating a Anderson Powerpole to 3.4mm dc connector for the Kenwood TH-F6A), we will build a pigtail for the Kenwood TH-F6A HT so we can recharge the radio's battery from the Nomad 7 via the Anderson Powerpole connector.
Good DX and 73, NJ2X
Articles in this series:
- Backpacking Amateur Radio Power: Requirements
- Backpacking Amateur Radio Power: Alternatives
- Project: Hacking the Nomad 7 Solar Panel for Amateur Radio Use
- Project: Fabricating a Anderson Powerpole to 3.4mm dc connector for the Kenwood TH-F6A
- Project: Regulating the 12v Output of the Nomad 7 Solar Panel
- Field Test: Nomad 7 Solar Panel Performance
Other related articles on NJ2X.COM
- Project: Anderson Powerpole Polarity Checker
- Project: Tiny Mint Tin Switched 9v Battery to Anderson Powerpole
- Project: PicoKeyer Plus Kit
- How To: Lock Together Anderson Powerpole Connectors
- Project: Anderson Powerpole to 2.1mm Connector Pigtail
- Project: Car power adapter to Anderson Powerpole
© Michael W. Maher and NJ2X.COM, 2016.

No comments:
Post a Comment